Products
Table of contents
Products are the units that are bought by a customer. CloudBilling requires products as purchases and pricing rules are related to a combination of the customer buying an item and the item, or product, that is bought. Like customer clusters, products are configured in a cluster structure. This means that Product Clusters have a tree-like structure and must be configured before Products can be added.
By default, at least three levels of Product clusters are common to have in a structure. The first level contains different types of services, e.g. “Public Cloud”. The second level then categorises the service in product categories, e.g. “CSP”. The third level will contain the individual products. Generally, the structure of the product clusters can be determined in three ways:
- Based on the categorization provided by the Cloud vendor
- Connectors use this categorization automatically.
- Based on the product catalogue of the CloudBilling user
- Based on the invoice design
Products and product categories
In Figure Products 1 the Products screen can be viewed in more detail. To travel to this screen, “Products” in the menu bar can be clicked. This screen contains a map structure on the left side under the header Categories. The indentation visualizes the tree structure of the product clusters and products. In the case of Figure Products 1, an example that can be seen is the starting point of the tree being “All Products”, after which a product clusters “Bundles” and “Usage” were added.

Figure Products 1: Product Categories Screen
A product cluster can be added by clicking the [Add Product Category] button. A product cluster has two mandatory values: a unique name and a parent product category (Figure Products 2). For the first product categories that are made, this will always be “All Products”. After this, more categories can be added in the newly made ones, which can also then also be found in the dropdown. The reference is automatically generated by CloudBilling.

Figure Products 2: Create Product Category Screen
Products are the lowest layer in this structure and can be added by clicking the [Add Product] button. A product needs a unique name, a product category, and at least one Reference as can be seen in Figure Products 3. Additionally, more SKUs can be added to a product. This is usually a unique, identifying product code. SKUs will be discussed in more detail in Chapter 2.3.1 below.
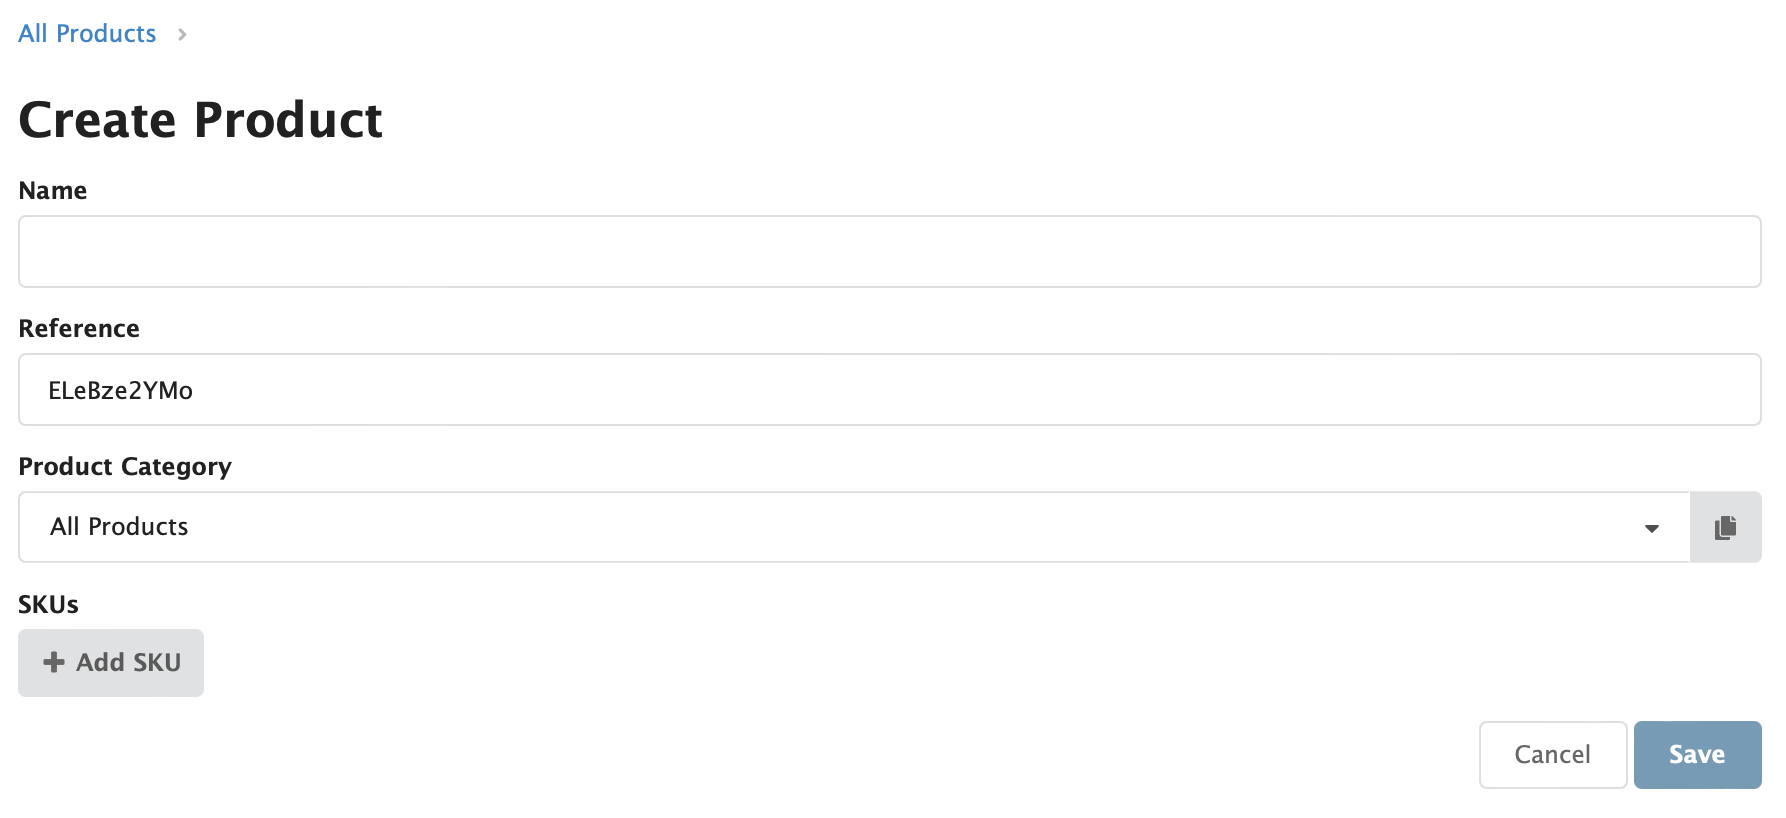
Figure Products 3: Create Product screen
SKU’s
SKU is an abbreviation for Stock Keeping Unit. Usually, these values are used to uniquely identify a product. These unique identifiers can be sent in through the API, or through the Excel Editor. A product that is made manually, however, should also still have a unique identifier and thus (at least one) unique reference. The reference is used by the product API in the reference field. Unique references can be sent in through either a custom API connection with a customer system, or through one of the more generic connectors like a CSP or an AWS connector. SKUs cannot be used as references, but should still be unique. SKUs can also be called “keys” or “identifiers”.
CloudBilling uses these SKUs to determine what product a purchase that comes in is referencing. Therefore, a purchase that comes in uses a reference that can be linked to an SKU that is in its turn linked to a certain product.
The SKU field is a free format field, which means that any text can be added in this field. A product can also have multiple SKUs if this is necessary. For example, a product can come in with a reference from a CSP connector, but the customer can also use another unique identifier for the same product in their own system.
As explained in the earlier Section “Products and product categories”, one or more SKUs can be added onto a product when making a new product. Additionally, a product can also be edited to add a new SKU.
Step by step: How to add an SKU
- Search for the product that you want to add the SKU onto.
- Click on the product name.
- Click on the [Add SKU] button.
- Type in your SKU in the text box.
- Click on [Save].
This can, for example, be useful when unmapped purchases come in. A purchase is unmapped when CloudBilling does not recognize the unique identifier, or SKU, that is sent with the purchase. CloudBilling cannot link an unknown identifier to a product. In Figure Products 4, two different ways of identifying unmapped purchases are shown in the red circles. Additionally, purchases will be further discussed in Chapter 2.4.
Important: Unmapped purchases can lead to missing usage on the invoice of a customer. Therefore, it is important to ensure that all purchases are properly mapped.

Figure Products 4: Identifying unmapped purchases
Step by step: How to add a ‘Product Category’
- Select [Products] in the menu.
- Click on [Add Child Category] to go to the ‘Create Product Category’ screen.
- Add a unique [Name].
- Add the appropriate [Parent Product Category] from the drop-down.
- Click on [Save].
Step by step: How to add a ‘Product’
- Select [Products] in the menu.
- Click on [Add Product] to go to the ‘Create Product’ screen.
- Add a unique [Name].
- Add the appropriate [Product Category] from the drop-down.
- Add a [SKU].
- Click on [Save].
Be aware of accidentally adding additional spaces. The SKU will not be identified if it does not match exactly.