Setup
Setup Guide
This setup guide is a step-by-step explanation for getting the VMware Agent ready to use. The setup consists of the following steps:
- Welcome
- Connect to a vCenter Server
- Customers in vCenter
- Connect to a vCloud Director
- Customers in vCloud Director
- Connect to CloudBilling
- Application Settings
- Complete
1. Welcome
The welcome page is the first page the user will see after opening the VMware Agent for the first time (see figure 1). It explains that the user will be walked through the setup process.
Click “Next”.
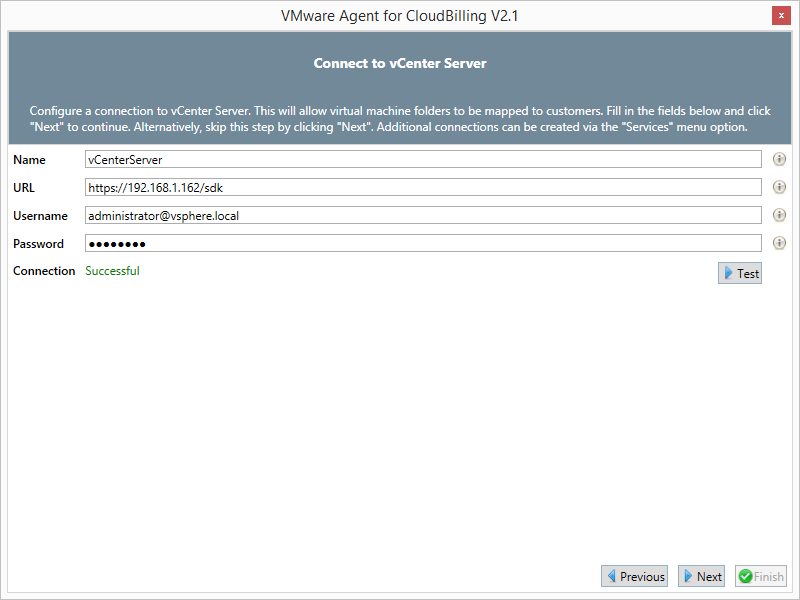
2. Connect to a vCenter Server
This step is to set up a connection with a vCenter Server, which will allow the user to map customers to virtual machine folders (see figure 2). Connecting to a vCenter Server is done by filling in the following fields:
- Name: A name for the service
- Url: The url of the vCenter Service (versions: 5.1 - 5.5). Format: “https://Hostname/sdk” Example: “https://10.10.10.10/sdk”
- Username: The username that will be used to connect to the service. The user must have admin rights. Format: “Domain\Username” Example: “mydomain\john”
- Password: The password that will be used to connect to the service.
- Connection: Test to see if a successful connection can be made.
When done, click “Next”.
Alternatively, this step can be skipped. A connection can be added later via the Services menu option. To skip, leave the fields empty and click “Next”.
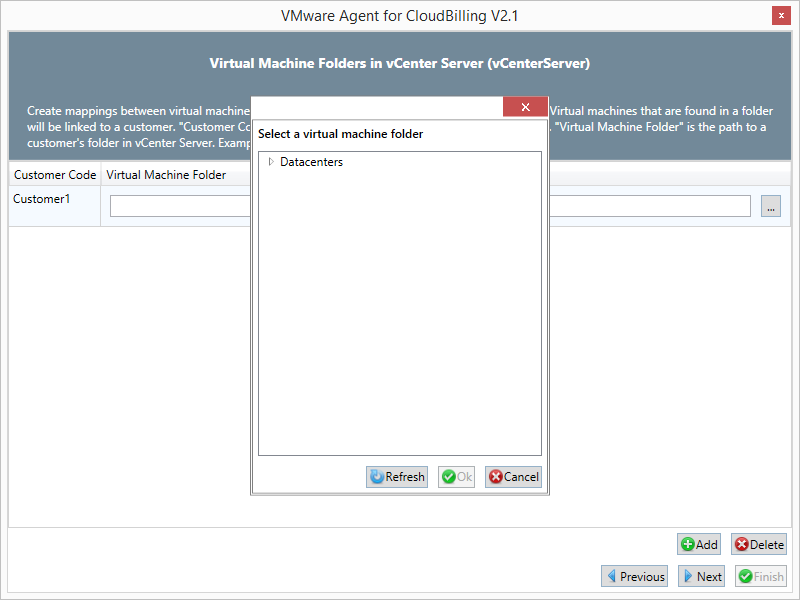
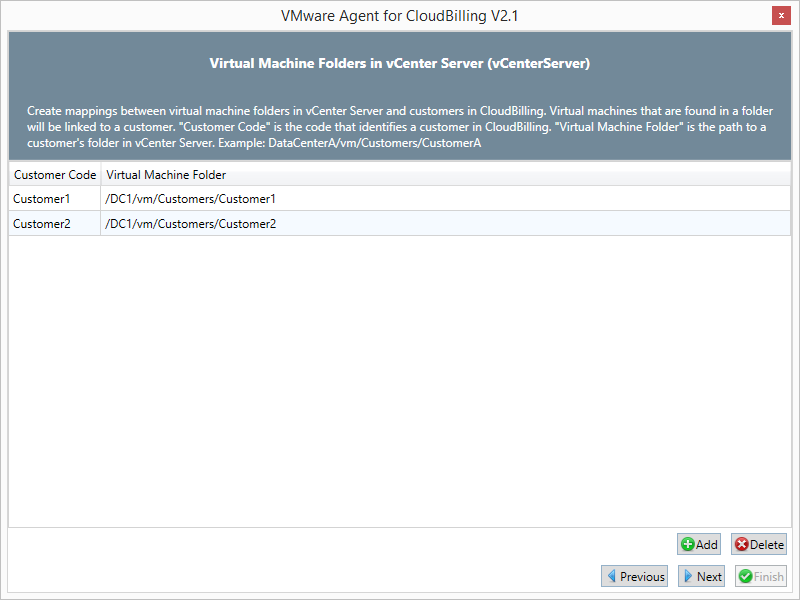
3. Customers in vCenter Server
In this step, mappings between customers in CloudBilling and Virtual Machine folders in vCenter will be added (see figure 4).
- Add a customer
- Click “Add”. A new row will appear in the table.
- Double-click the empty cell in column “Customer Code” and fill in the code of the customer in CloudBilling. This code will appear on the purchases.
- Double-click the empty cell in column “Virtual Machine Folder”. On the right side of the row, a button with “…” will show. This is the select button. Click this button. Select a folder and click “Ok”. See figure 3. OR Double-click the empty cell in column “Virtual Machine Folder”. Type in the directory of the folder manually.
- Delete a customer
- Select an existing row by clicking on it. Or, select multiple rows by holding in the mouse button and dragging.
- Click “Delete”.
When done, click “Next”.
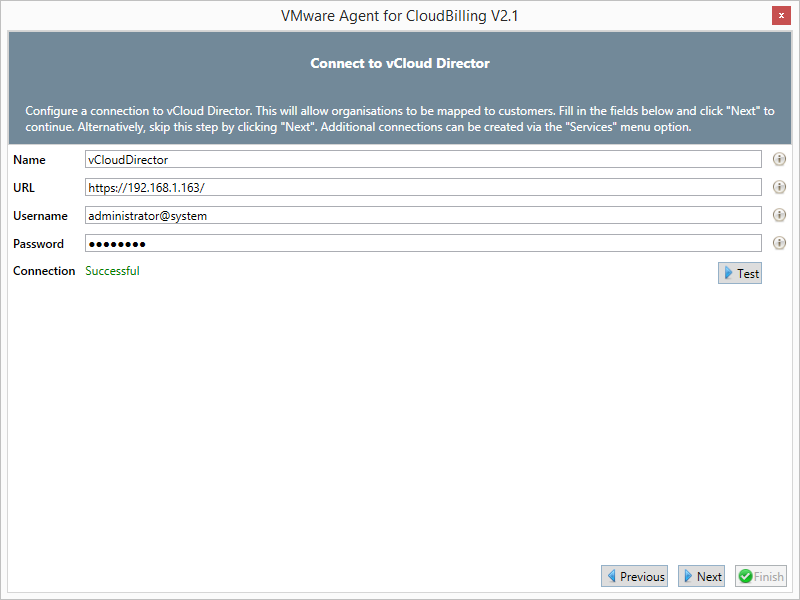
4. Connect to a vCloud Director
This step is to set up a connection with a vCloud Director service, which will allow the user to map customers to organisations (see figure 5). Connecting to a vCloud Director service is done by filling in the following fields:
- Name: A name for the service
- Url: The url of the vCloud Director service (versions: 5.1 - 5.5). Format: “https://Hostname” Example: “https://10.10.10.10”
- Username: The username that will be used to connect to the service. The user must have admin rights. Format: “Username@system” Example: “john@system”
- Password: The password that will be used to connect to the service.
- Connection: Test to see if a successful connection can be made.
When done, click “Next”.
Alternatively, this step can be skipped. A connection can be added later via the Services menu option. To skip, leave the fields empty and click “Next”.
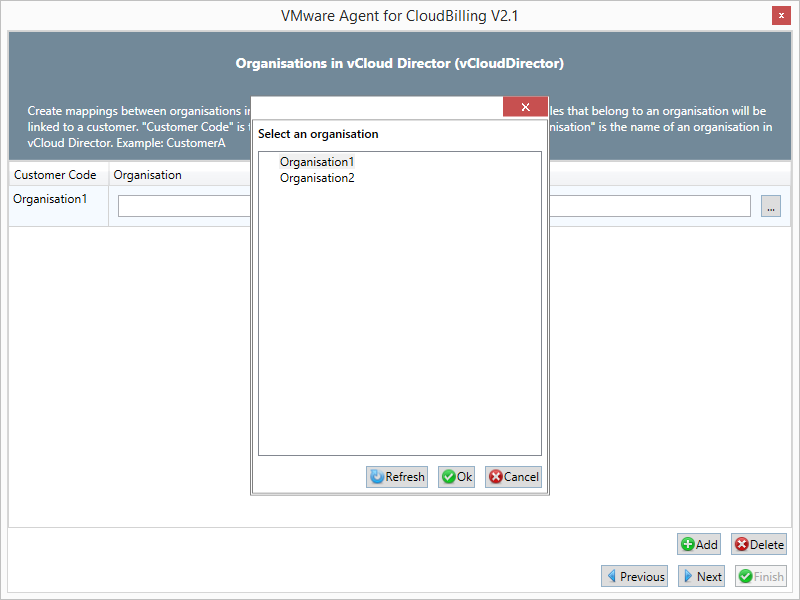
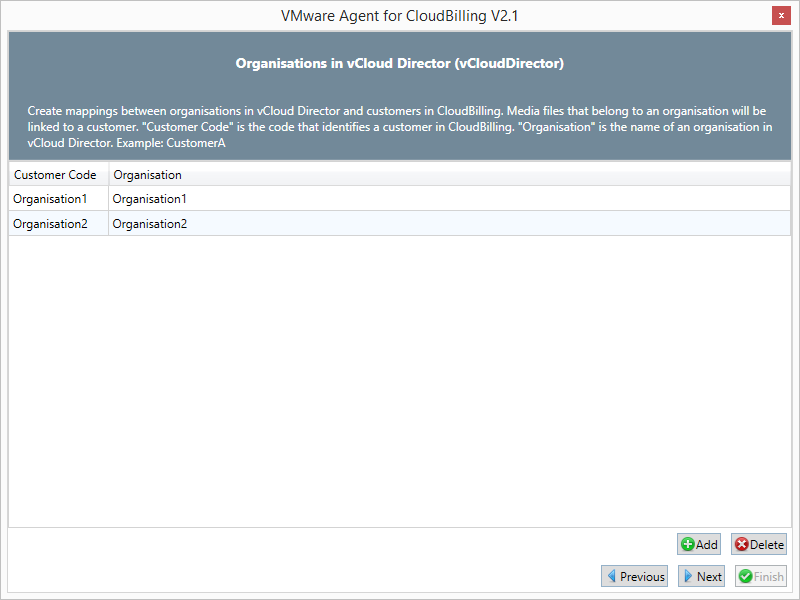
5. Customers in vCloud Director
In this step, mappings between customers in CloudBilling and organisations in vCloud Director will be added (see figure 7).
- Add a customer
- Click “Add”. A new row in the table will show.
- Double-click the empty cell in column “Customer Code” and fill in a Customer Code (this will appear on the purchase).
- Double-click the empty cell in column “Organisation”. On the right side of the row, a button with “…” will show. This is the select button. Click this button. Select an organisation and click “Ok”. See figure 6. OR Double-click the empty cell in column “Organisation”. Fill in the organisation manually.
- Delete a customer
- Select an existing row by clicking on it. Or, select multiple rows by holding in the mouse button and dragging.
- Click “Delete”.
When done, click “Next”.
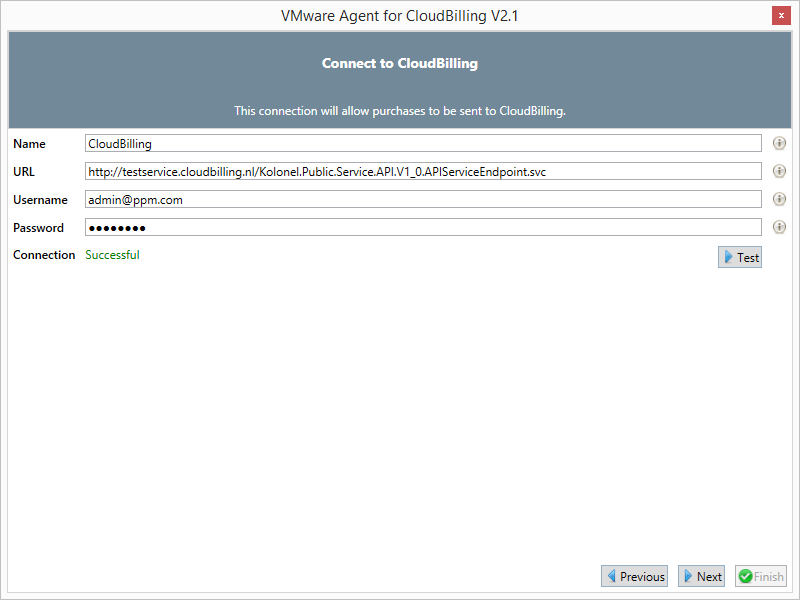
6. Connect to CloudBilling
This step is to set up a connection with CloudBilling, which will allow purchases to be sent through to CloudBilling (see figure 8). Connecting to CloudBilling is done by filling in the following fields:
- Name: A name for the service
- Url: The url of the CloudBilling service (Version:V1_0). Format: “https://Hostname/ServiceEndpoint” Example: “https://api.billing.inter8.co/Kolonel.Public.Service.API.APIServiceEndpoint.svc”
- Username: The username that will be used to connect to the service.
- Password: The password that will be used to connect to the service.
- Connection: Test to see if a successful connection can be made.
When done, click “Next”.
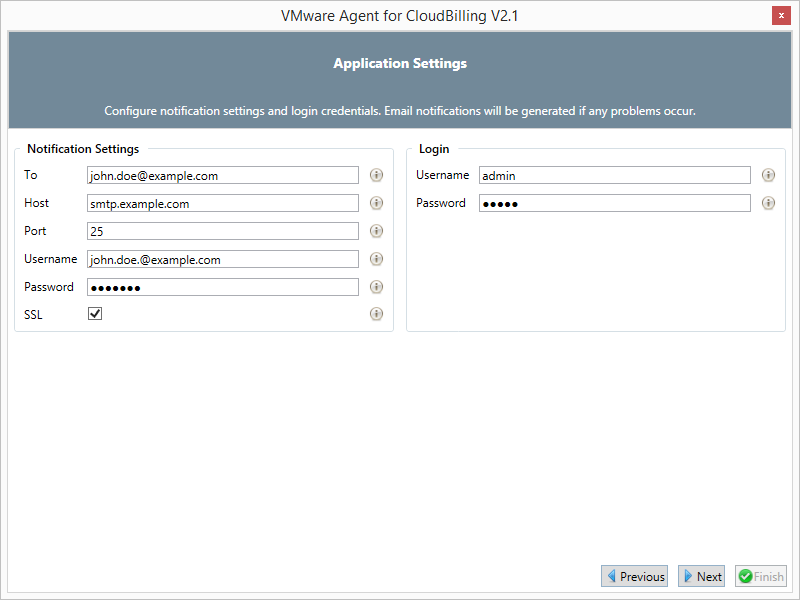
7. Application Settings
These are general settings of the application (see figure 9).
- Notification Settings
- To: The email address that notifications will be sent to.
- Host: The hostname or ip address of the SMTP server.
- Port: The port of the SMTP server.
- Username: The username required by the SMTP server.
- Password: The password required by the SMTP server.
- Ssl: Indicates if SSL required by the SMTP server.
- Login These settings allow a login to be specified to secure the agent management UI. That is, the next time the agent management UI (this application) is started, it will prompt for a username and password. These can be specified here.
- Username: The username that is used to log in.
- Password: The password that is used to log in.
When done, click “Next”.
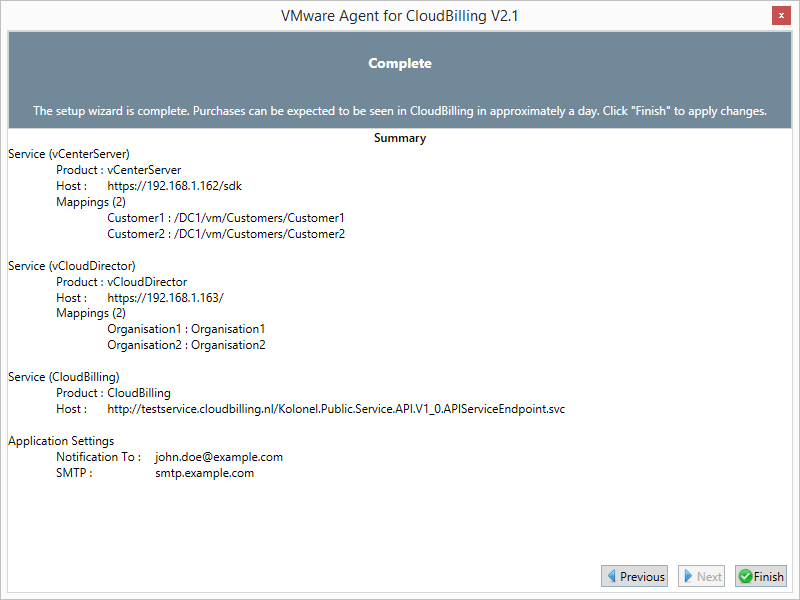
8. Complete
This is the last page of the setup process (see figure 10). It gives an overview of the settings that have been entered by the user.
To save the settings and complete the setup guide, click “Finish”. The user will now be directed to the Dashboard.
To go back and change settings, click “Previous”.